• Skip to main content
  • Skip to primary sidebar
  • Skip to footer

Sage Baking

Tasty Pins Sample Affiliate Post

January 31, 2018 by Bjork 1 Comment

The article below is a fictional example of an affiliate post. We encourage you to use it as inspiration, but be sure to use your own experiences and words when writing your own. This post includes active affiliate links for illustration purposes only.

Pinterest is one of the best ways for bloggers to drive traffic. To be successful on Pinterest, it helps to be intentional about optimizing your pins. The process of optimizing your pins includes writing proper descriptions using keywords and hashtags.

All this optimization can feel like a lot of extra work, but it is worth the effort. Fortunately, there is a wonderful WordPress plugin called Tasty Pins that will help make the process easy.

Tasty Pins allows you to create your Pinterest descriptions right in your WordPress media library— that way, when you or your readers pin from your site the optimized description is shared automatically.

Tasty Pins has some other really cool features:

  • Tasty Pins allows you to hide pinterest-specific images on your page.
  • You can use Tasty Pins to disable pinning on specific images.
  • Using Tasty Pins can help you improve your SEO. 
  • Tasty Pins comes with unlimited support!

I love how Tasty Pins has simplified my workflow and made it easier to optimize my Pinterest marketing efforts.

Need more convincing? Check out these glowing user testimonials.

You can purchase Tasty Pins here for only $29!

Filed Under: Uncategorized

Tasty Recipes Sample Affiliate Post

January 31, 2018 by Bjork 1 Comment

The article below is a fictional example of an affiliate post. We encourage you to use it as inspiration, but be sure to use your own experiences and words when writing your own. This post includes active affiliate links for illustration purposes only. 

As a blogger, I use a number of online tools to run my business. One of the most important tools for a food blogger is a high-quality recipe plugin. A good recipe plugin makes it easy for bloggers to format recipes in a way that is easy for readers to use.

My recipe plugin of choice is Tasty Recipes. It’s a well designed plugin created by the team at Food Blogger Pro.

I chose the Tasty Recipes plugin for a number of reasons:

  • Tasty Recipes made it easy for me to convert my recipes from my old recipe plugin.
  • Tasty Recipes is designed with rock solid SEO, so it makes Google happy.
  • Tasty Recipes integrates seamlessly with my site design and can be customized further with ease.
  • I can easily monetize my recipes with ad units and affiliate links.
  • I can add nutrition information to my recipes manually, or I can add the Nutrifox plugin for an additional fee.
  • Tasty Recipes is actively maintained and developed. This is HUGE. It is important that your plugin is up to date.
  • Tasty Recipe comes with unlimited support. So if I get stuck, I can ask for help…and get it.
  • Tasty Recipes gets amazing reviews! Check out all these great testimonials.

You can see why this plugin is worth $79 per year. You really get your money’s worth.

I’ve included a recipe below so you can see for yourself how great the recipes look. I highly recommend Tasty Recipes for your food blog.

You can purchase the plugin here.

Print
clock clock iconcutlery cutlery iconflag flag iconfolder folder iconinstagram instagram iconpinterest pinterest iconfacebook facebook iconprint print iconsquares squares iconheart heart iconheart solid heart solid icon

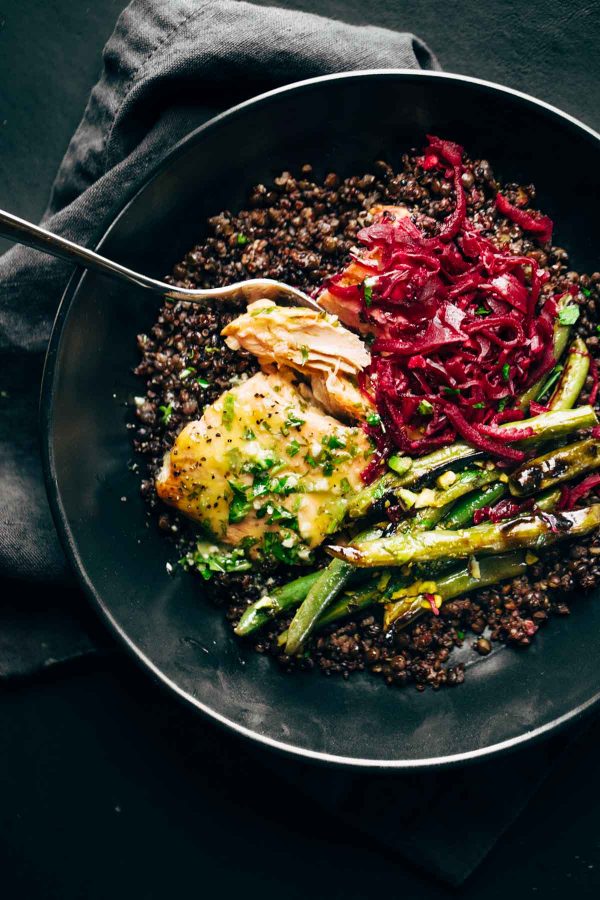
Perfect Baked Salmon with Lentils and Lemon Herb Sauce

★ 5 Stars ☆ ★ 4 Stars ☆ ★ 3 Stars ☆ ★ 2 Stars ☆ ★ 1 Star ☆

No reviews

Print Recipe
Save Recipe Recipe Saved

This one dish baked salmon is easy and delicious.

  • Total Time: 1 hour 10 minutes
  • Yield: 6 servings 1x

Ingredients

Units Scale
  • 1 cup black lentils
  • 1 cup red quinoa
  • 4 cups chicken or vegetable broth
  • 12 ounces salmon
  • 2–3 cups green beans or other vegetables
  • purple sauerkraut if you’re into the weird food zone like I am

Lemon Herb Sauce:

  • 1/2 cup olive oil
  • 1/4 cup lemon juice
  • 1 clove garlic
  • generous pinch of salt (to taste)
  • quick squeeze of honey or agave (to taste)
  • chopped parsley (optional)

Instructions

  1. LENTILS AND QUINOA: Preheat the oven to 450 degrees. Rinse the lentils and the quinoa. Place in a large oven safe skillet or casserole with the broth. Bake for 45-50 minutes or until almost fully cooked. Remove and fluff with a fork.
  2. SAUCE: Make the lemon dressing by blending all ingredients in a food processor or just shaking up in a jar. Set about half of the dressing aside.
  3. SALMON: When the lentils and quinoa are done, place the salmon and any other vegetables you want on top of the lentils (skin side down) and drizzle or brush with half of the lemon dressing. Bake for another 10 minutes. Broil for the last 2 minutes. Depending on how thick the salmon is, if it still needs time, just turn off the oven and let it sit in there for a few minutes to finish.
  4. SERVE: When the salmon is fully cooked, serve with reserved sauce and purple sauerkraut if you like that kind of crazy.

Notes

Some vegetables will cook just fine in 10 minutes in a hot oven, but others won’t. If you’re using something that’s going to require more time like sweet potatoes, I would suggest par-boiling them before sending them to the oven. Veggies that work great – green beans, asparagus, kale, brussels sprouts, cauliflower, mushrooms, peas… etc.

I’m okay with less, but you may want more salmon per serving – for a full 3 ounces per serving, go for a total of 15-20 ounces vs. 12 ounces as written.

  • Prep Time: 10 minutes
  • Cook Time: 1 hour

Nutrition

  • Calories: 516
  • Fat: 28g

Love this recipe?

Share a photo and tag us on Instagram (@sagebaking) — we can't wait to see what you've made!

Filed Under: Uncategorized

Leek & Artichoke Quiche

February 22, 2017 by Bjork 4 Comments

Print
clock clock iconcutlery cutlery iconflag flag iconfolder folder iconinstagram instagram iconpinterest pinterest iconfacebook facebook iconprint print iconsquares squares iconheart heart iconheart solid heart solid icon

Leek & Artichoke Quiche

★★★★★

5 from 2 reviews

Print Recipe
Save Recipe Recipe Saved

This Leek & Artichoke Quiche with Red Peppers is my favorite brunch recipe ever. It’s also amazing for dinner! With extra pie crust for all you crust-lovers out there!

  • Total Time: 1 hour 35 minutes
  • Yield: 6 servings 1x

Ingredients

Units Scale

For the filling:

  • 1 leek
  • 2 tsp olive oil
  • 4 eggs
  • 1 cup milk
  • 1/4 cup artichoke hearts, cut into bite-sized pieces
  • 1/4 cup sliced roasted red pepper
  • 1/4 tsp salt
  • 1 cup cheddar cheese

For the crust:

  • 1 recipe pie crust

Instructions

For the crust:

  1. Prepare the pie crust. Let rest in the fridge for 30 minutes, then roll out into a 12″ circle and place in a greased 10″ tart pan. Let the extra crust hang over the edge and freeze for 20 minutes.

For the filling:

  1. Preheat your oven to 350ºF.
  2. Slice the leek into 1/4? rounds. Heat a skillet over medium-high heat and add the olive oil and leeks. Cook, stirring often, until the leeks are soft and browned in some spots.
  3. Scramble the eggs in a large bowl. Add the cooked leeks, milk, artichoke hearts, roasted red pepper, salt, and about 2/3 of the cheese. Mix to combine.
  4. Place a sheet of parchment over the frozen pie crust, then fill with pie weights. Bake for 10 minutes, then remove the pie weights and remove the overhanging crust.
  5. Pour in the egg filling. Top with the remaining cheese, then bake for about 35 minutes, until golden on top and mostly firm in the middle.
  6. Let cool for about 10 minutes before removing from the tart pan and serving. Eat!

Notes

I used canned artichoke hearts and roasted red pepper.

I used the back of a spoon to press the overhanging crust into the edge of the tart pan, causing it to separate. If you’re using a pie dish, scissors might work better.

If you are using my pie crust recipe but you aren’t looking for a vegan crust, just replace the vegan butter with regular salted butter.

If you are dairy-free, use the vegan pie crust as written and use plain, unsweetened soy milk in the quiche and omit the cheese.

  • This is item 1 in a bulleted list
  • This is item 2 in a bulleted list

This is another paragraph

  1. This is item 1 in an ordered list
  2. This is item 2 in an ordered list
  • Author: Raquel Smith
  • Prep Time: 1 hour
  • Cook Time: 35 minutes
  • Category: Breakfast, Eggs
  • Method: Bake
  • Cuisine: American

Love this recipe?

Share a photo and tag us on Instagram (@sagebaking) — we can't wait to see what you've made!


Filed Under: Uncategorized

Cabbage & Potato Soup

February 21, 2017 by Bjork 20 Comments

Print
clock clock iconcutlery cutlery iconflag flag iconfolder folder iconinstagram instagram iconpinterest pinterest iconfacebook facebook iconprint print iconsquares squares iconheart heart iconheart solid heart solid icon

Cabbage & Potato Soup

★★★★★

5 from 19 reviews

Print Recipe
Save Recipe Recipe Saved

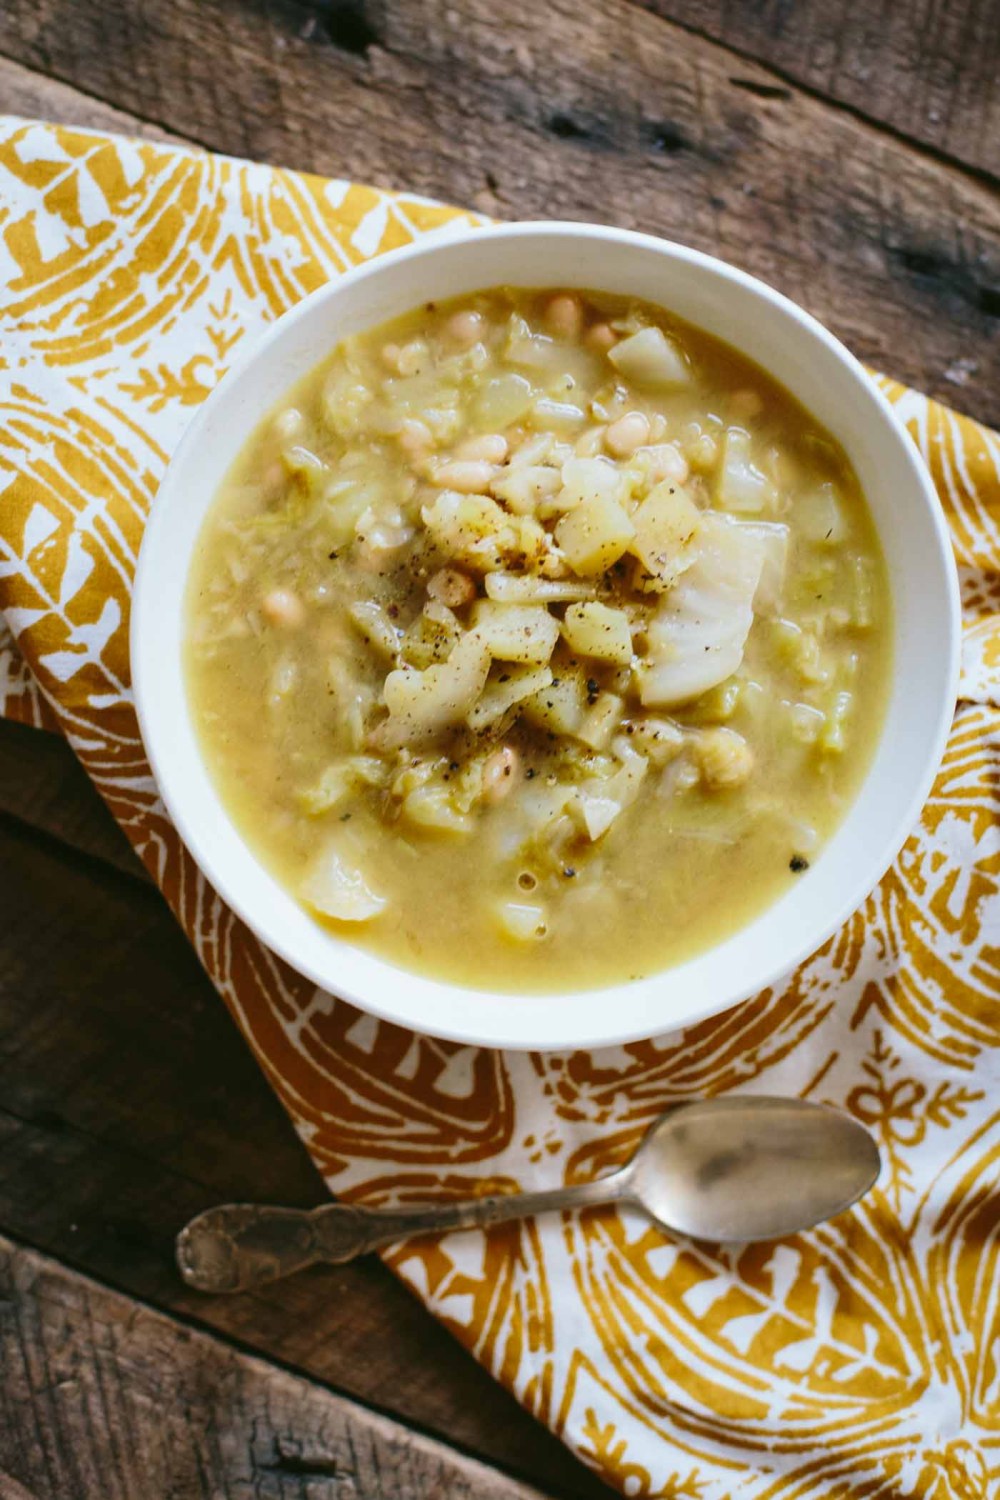
A simple cabbage and potato soup that everyone will love.

  • Total Time: 45 minutes
  • Yield: 6 servings 1x

Ingredients

Units Scale
  • 1 medium cabbage
  • 1/4 cup olive oil
  • 3 cloves garlic, minced
  • 3 large gold potatoes
  • 4 cups light-colored vegetable broth
  • 1/2 tsp coarse sea salt These are affiliate links.
  • 1/4 tsp dried thyme
  • 1 can white beans, rinsed & drained
  • 1 Tbsp butter, vegan or otherwise
  • freshly cracked black pepper

Instructions

  1. Cut the cabbage into quarters, then thinly slice. Heat the olive oil over medium heat in a large pot. Add the cabbage and cook for about 15 minutes, tossing often, until it’s decreased to about 1/3 its original size and is tender.
  2. While the cabbage cooks, mince the garlic and cut the potatoes into small 1/2″ cubes. Add to the cabbage and cook for an additional 5 minutes. Add the broth, salt, and thyme and bring to a boil, then turn the heat to low and let simmer for 15 minutes, partially covered, until everything is soft.
  3. Add the beans and let simmer until warm, then stir in the butter and a bunch of black pepper. Taste and add more salt if necessary. The broth should be just a tad too salty – when eaten with the cabbage and potatoes it all evens out nicely. Serve.

Notes

– If you are using fine-grained salt such as table salt, start with 1/4 tsp.

– The right kind of vegetable broth can make or break a soup. Make sure you’re using a kind you’ve tried (and liked) before. A light-colored broth is best. I love the O Organics brand from Vons/Safeway, if you can find it.

  • Author: Raquel Smith
  • Prep Time: 5 mins
  • Cook Time: 40 mins
  • Category: Dinner
  • Cuisine: American

Love this recipe?

Share a photo and tag us on Instagram (@sagebaking) — we can't wait to see what you've made!


Filed Under: Clariti Test, Uncategorized

Spicy Sesame Zoodles with Crispy Tofu

February 10, 2017 by Bjork Leave a Comment

Print
clock clock iconcutlery cutlery iconflag flag iconfolder folder iconinstagram instagram iconpinterest pinterest iconfacebook facebook iconprint print iconsquares squares iconheart heart iconheart solid heart solid icon

Spicy Sesame Zoodles with Crispy Tofu

★ 5 Stars ☆ ★ 4 Stars ☆ ★ 3 Stars ☆ ★ 2 Stars ☆ ★ 1 Star ☆

No reviews

Print Recipe
Save Recipe Recipe Saved

Ingredients

Units Scale

Chili Sesame Sauce:

  • 1/2 cup peanut butter
  • ? cup sesame oil
  • ? cup light low sodium soy sauce
  • 1/4 cup rice vinegar
  • 2 tablespoons chili paste (like sambal oelek)
  • 2 tablespoons sugar
  • 1 clove garlic, minced
  • 1 knob of fresh ginger, peeled and grated

Zoodles and Tofu

  • 12 ounces extra firm tofu
  • 4–6 zucchini
  • sesame seeds and scallions for topping

Instructions

  1. Chili Sesame Sauce: Shake all the sauce ingredients in a jar or toss them in the food processor and give them a whirl. If you’re going to have this cold, refrigerate your sauce for a while.
  2. Tofu:Press excess moisture out of the tofu. Cut into bite sized pieces. Heat a tiny bit of oil in a nonstick pan. Add the tofu and stir fry until golden brown. Add about ½ cup sauce and simmer until the sauce starts to evaporate / absorb into the tofu and becomes browned in the pan. Keep gently flipping and scraping browned bits off the bottom – after a while, you should end up with nicely golden brown tofu with some little yummy browned bits from the sauce.
  3. All Together: Spiralize your zucchini and toss with about ¼ cup sauce per serving. Top with tofu, sesame seeds, and scallions. Serve immediately.

Notes

I did NOT cook the zoodles. I wanted this to be more like a salad, cold and creamy and crunchy. Whether or not you cook the zoodles, when the sauce hits those zoodles they’re going to get a little watery. I found that this was only a problem when I didn’t serve immediately, so to avoid excess moisture, serve it right after you toss it up!

You may want to use more tofu depending on how many servings you are wanting to get out of this. I was fine with 12 ounces as 6 servings (just doing a small scoop of tofu on each pile of zoodles) but if you were super hungry you might want more.

Storing this: I would store the sauce separate from the zoodles and tofu, and then toss it all together just before serving.

Love this recipe?

Share a photo and tag us on Instagram (@sagebaking) — we can't wait to see what you've made!

Filed Under: Uncategorized

Arepas with Carnitas and Sweet Potato

February 10, 2017 by Bjork 1 Comment

[amd-zlrecipe-recipe:3]

Filed Under: Uncategorized

6-Ingredient Espresso Brownies

February 10, 2017 by Bjork 1 Comment

Print
clock clock iconcutlery cutlery iconflag flag iconfolder folder iconinstagram instagram iconpinterest pinterest iconfacebook facebook iconprint print iconsquares squares iconheart heart iconheart solid heart solid icon

6-Ingredient Espresso Brownies

★★★★★

5 from 1 review

Print Recipe
Save Recipe Recipe Saved

Ingredients

Units Scale
  • 1 cup salted butter, melted
  • 2 cups granulated sugar
  • ? cup DeLallo espresso powder
  • 4 eggs
  • 1 1/2 cups all purpose flour
  • 1 cup unsweetened cocoa powder

Instructions

  1. Preheat the oven to 350 degrees.
  2. Cream the butter and the sugar. Add the espresso powder and mix until combined. Add eggs and mix until combined. Add the flour and cocoa powder and stir to combine. Add a pinch of sea salt These are affiliate links. and/or a handful of chocolate chips if you’re feeling ambitious.
  3. Transfer to a 9×13 baking pan lined with parchment paper. Bake for 30 minutes or until set in the middle (I usually like to underbake mine so 30 minutes is just about right for that – if you want more chewy brownies, go for 35-40). Eat and be happy!

Love this recipe?

Share a photo and tag us on Instagram (@sagebaking) — we can't wait to see what you've made!

Filed Under: Uncategorized

Perfect Baked Salmon with Lentils and Lemon Herb Sauce

February 10, 2017 by Bjork 1 Comment

Print
clock clock iconcutlery cutlery iconflag flag iconfolder folder iconinstagram instagram iconpinterest pinterest iconfacebook facebook iconprint print iconsquares squares iconheart heart iconheart solid heart solid icon

Perfect Baked Salmon with Lentils and Lemon Herb Sauce

★ 5 Stars ☆ ★ 4 Stars ☆ ★ 3 Stars ☆ ★ 2 Stars ☆ ★ 1 Star ☆

No reviews

Print Recipe
Save Recipe Recipe Saved

This one dish baked salmon is easy and delicious.

  • Total Time: 1 hour 10 minutes
  • Yield: 6 servings 1x

Ingredients

Units Scale
  • 1 cup black lentils
  • 1 cup red quinoa
  • 4 cups chicken or vegetable broth
  • 12 ounces salmon
  • 2–3 cups green beans or other vegetables
  • purple sauerkraut if you’re into the weird food zone like I am

Lemon Herb Sauce:

  • 1/2 cup olive oil
  • 1/4 cup lemon juice
  • 1 clove garlic
  • generous pinch of salt (to taste)
  • quick squeeze of honey or agave (to taste)
  • chopped parsley (optional)

Instructions

  1. LENTILS AND QUINOA: Preheat the oven to 450 degrees. Rinse the lentils and the quinoa. Place in a large oven safe skillet or casserole with the broth. Bake for 45-50 minutes or until almost fully cooked. Remove and fluff with a fork.
  2. SAUCE: Make the lemon dressing by blending all ingredients in a food processor or just shaking up in a jar. Set about half of the dressing aside.
  3. SALMON: When the lentils and quinoa are done, place the salmon and any other vegetables you want on top of the lentils (skin side down) and drizzle or brush with half of the lemon dressing. Bake for another 10 minutes. Broil for the last 2 minutes. Depending on how thick the salmon is, if it still needs time, just turn off the oven and let it sit in there for a few minutes to finish.
  4. SERVE: When the salmon is fully cooked, serve with reserved sauce and purple sauerkraut if you like that kind of crazy.

Notes

Some vegetables will cook just fine in 10 minutes in a hot oven, but others won’t. If you’re using something that’s going to require more time like sweet potatoes, I would suggest par-boiling them before sending them to the oven. Veggies that work great – green beans, asparagus, kale, brussels sprouts, cauliflower, mushrooms, peas… etc.

I’m okay with less, but you may want more salmon per serving – for a full 3 ounces per serving, go for a total of 15-20 ounces vs. 12 ounces as written.

  • Prep Time: 10 minutes
  • Cook Time: 1 hour

Nutrition

  • Calories: 516
  • Fat: 28g

Love this recipe?

Share a photo and tag us on Instagram (@sagebaking) — we can't wait to see what you've made!

Filed Under: Uncategorized

Homemade Dog Treats

January 6, 2017 by Bjork 4 Comments

Calling all dog lovers for a cute holiday baking project involving HOMEMADE DOG TREATS and BACON PB GLAZE! lols, life is awesome.

Homemade Dog Treats - 5 ingredient wholesome treats for your pup! | pinchofyum.com

Oh, hi there!

I’ve been doing some holiday baking this week for my friends, annnd by baking I mean homemade dog treats, and by friends I mean my dog.

That counts, right?

Homemade Dog Treats - 5 ingredient wholesome treats for your pup! | pinchofyum.com

I am 100% not the type of person who makes food for their dog, except for that right now, this exact very minute, I am that person. !!! I do not even know myself anymore. Making my own dog treats? Honestly. File under Things You Said You’d Never Do That Now Bring You a Weird Amount of Great Joy.

Print
clock clock iconcutlery cutlery iconflag flag iconfolder folder iconinstagram instagram iconpinterest pinterest iconfacebook facebook iconprint print iconsquares squares iconheart heart iconheart solid heart solid icon

Homemade Dog Treats

★★★★★

5 from 3 reviews

Print Recipe
Save Recipe Recipe Saved

These homemade dog treats are sure to make your pup bark with joy!

  • Total Time: 25 minutes
  • Yield: 30 biscuits 1x

Ingredients

Units Scale

Dog Bicuits

  • 1 cup pumpkin
  • 1/2 cup peanut butter
  • 2 eggs
  • 1/4 cup oil
  • 2 1/2 cups whole wheat flour
  • 1 tsp baking soda

Glaze

  • 2 Tbsp bacon grease, melted
  • 1/4 cup smooth peanut butter

Instructions

  1. Preheat oven to 350 degrees.
  2. Combine pumpkin, peanut butter, eggs, and oil in a bowl. Add in baking soda and whole wheat flour. Stir until a stiff dough forms. Knead dough or mix just until flour is incorporated.
  3. Roll out dough with a rolling pin and use a cookie cutter to cut out dog bone shapes, or just bake into little circles like cookies. Bake for 15 minutes.
  4. Whisk the bacon grease and peanut butter until very smooth. Drizzle over the treats and cool till glaze hardens (it does best in the fridge or freezer).

Notes

  • We just used a basic canola oil, but we also give Sage coconut oil for her fur/skin, and I think coconut oil would work nicely here. You can also use coconut oil in place of the bacon grease in the glaze, but, I mean, come on. It’s bacon grease. SO YUMMY.
  • All ingredients are considered safe for dogs, but as with humans, it’s always a good idea to make sure there are no doggie allergies or sensitivities to any of the ingredients.
  • Author: Lindsay Ostrom
  • Prep Time: 10 mins
  • Cook Time: 15 mins

Nutrition

  • Serving Size: 1 biscuit
  • Calories: 101
  • Sugar: 1g
  • Sodium: 49mg
  • Fat: 6.5g
  • Carbohydrates: 9g
  • Fiber: 1.4g
  • Protein: 3.2g
  • Cholesterol: 11.5mg

Love this recipe?

Share a photo and tag us on Instagram (@sagebaking) — we can't wait to see what you've made!

Filed Under: Uncategorized

Nutrifox Affiliate Example Post

January 4, 2017 by Bjork 2 Comments

nutrifox-affiliate-example-post

The article below is a fictional example of an affiliate post. We encourage you to use it as inspiration, but be sure to use your own experiences and words when writing your own. This post includes active affiliate links for illustration purposes only. 

I am a big fan of desserts and sweets. In order to have my cake and eat it too — I try to be mindful of my portions and the nutritional values of the foods I eat.

That is why I am a label reader. When I’m at the store, if I’m buying a new product I like to check out the ingredients, portion sizes and nutrients in order to decide if the food is a good choice for me and my family.

As a food blogger, I wanted to be able to provide my readers with the same valuable nutrition information for my recipes. That is why I’m so happy I found Nutrifox!

What is Nutrifox?

Nutrifox is an online tool that helps you easily create and embed nutrition labels. Since I’ve started using Nutrifox, I’ve experienced an increase in comments from happy readers. One reader told me she keeps coming back to my blog because the nutrition information helps her stay on track with her goals.

How does it work?

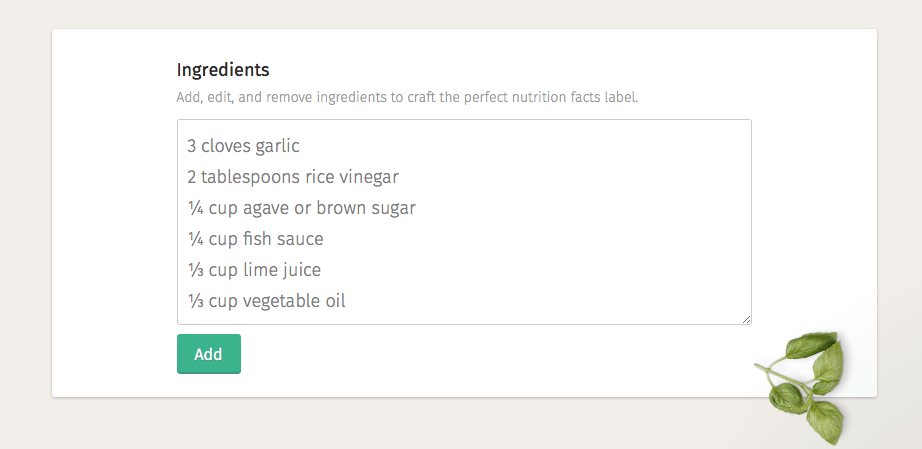
Nutrifox is so easy to use. You simply copy and paste your recipe ingredients into the form to generate a nutrition label.

You can customize the labels to include a variety of micro and macro nutrients.

Once you’ve completed your label, you can grab the code and embed it in your blog post.

Here is how the Nutrifox nutrition labels look…

Nice, right? They are clear and easy to understand, just like the ones you see in the grocery store.

If you are a blogger and you want to level up your recipe posts, I highly recommend you add Nutrifox to your posts. Give your readers what they want!

You can get a free 2-week trial here. After that it is only $9 a month. Sweet deal!

Filed Under: Uncategorized

  • « Go to Previous Page
  • Go to page 1
  • Interim pages omitted …
  • Go to page 3
  • Go to page 4
  • Go to page 5
  • Go to page 6
  • Go to page 7
  • Go to Next Page »

Primary Sidebar

Recent Posts

  • 5 Ingredient Green Curry
  • Ooey, Gooey Chocolate Chip Cookies
  • gooey cinnamon rolls
  • Tasty Sourdough Bread
  • NF Shortcode

Subscribe to email updates!

[mc4wp_form id=”1125″]

Footer

Privacy Policy

Copyright © 2025 Sage Baking on the Foodie Pro Theme